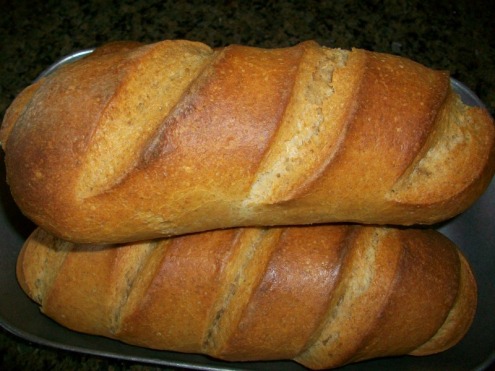
 Another rustic bread from The Bread Baker's Apprentice. According to Peter Reinhart, this is the classic country bread of France and can be made into all kinds of different shapes and sizes. It usually is made with a small amount of either whole wheat or rye flour to give a denser crumb. And although so many of the other folks who have participated so far in this challenge had chosen to use a more interesting shape, I thought I would just make plain old batards and celebrate the simplicity of the bread. You should know that this is a two day bread starting with a pate fermentee, and If you don't have the book you can find the recipe here. 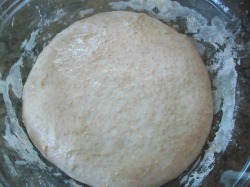 Here is the finished dough being left to rise until it doubles in bulk. This dough was actually pretty easy to handle, even with the use of my wild yeast, "Adam". I chose to use a touch of whole wheat in mine, since Adam is a whole wheat starter. 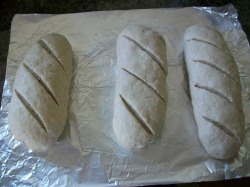 The loaves were shaped into batards, and I covered them to let rise a second time until they rose to 1 1/2 of it's original size, before scoring and putting them into the oven. 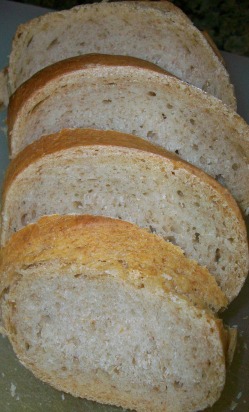 This bread was really delicious. It had a nice earthiness from the whole grain, and the crust was wonderfully hard and golden brown. The texture was chewy and the flavor from the pate fermentee was so complex. I see why so many other bakers have experimented using different shapes. Maybe next time I will give more attention to forming a different shape. I can definitely see myself making this one again.
yeastspotted.
4 Comments
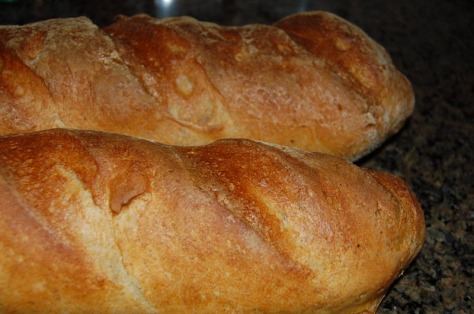
 This is bread. If you have never tried this bread before, you're in for a treat. In The Bread Baker's Apprentice, Peter Reinhart gives the simplest of ingredients here and makes use of a slow cold fermentation in the fridge to extract sugars from the wheat. According to Mr. Reinhart, this develops loads of flavor from the dough and creates a final product that is oh-so complex. Naturally, the Bread baker's apprentice Challenge folks does not wish for me to share the recipe, but it's all over the internet already, like if you look here. 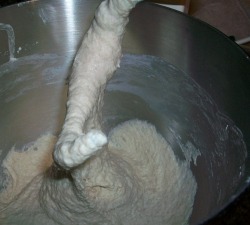 This was a VERY wet dough. The original recipe says that: "The dough should be sticky on the bottom of the bowl, but it should release from the sides of the bowl." I wasn't sure quite what that meant, but I just mixed until it looked a little "stringy". 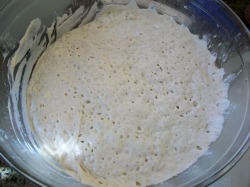 The dough was allowed to ferment in the refrigerator overnight and then left out at room temp to double in bulk. Because I used my wild yeast(Adam) here the rise was a bit different from the pictures from other bloggers. 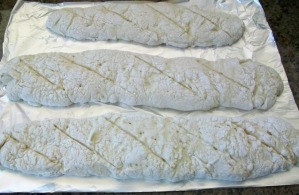 When I first saw the recipe, I realized that it made up to 6 baguettes, so I halved the ingredient list and ended up making only 2 or 3 instead. After scoring the loaves, I baked them at 500 degrees and sprayed the oven twice at one minute intervals at the beginning baking cycle. I then turned down the temp to 375 degrees and baked until done, which took me about 24minutes or so. 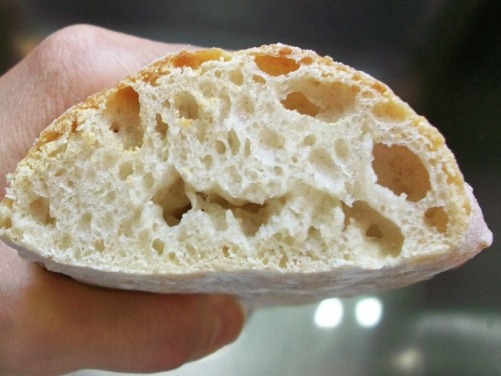 The final bread was delicious and crusty, and I was a little disappointed to see the lack of a BIG open crumb, but it was tasty, nonetheless. A definite keeper in the bread making repertoire.
yeastpotted. 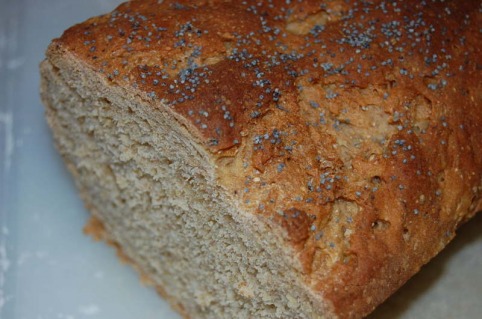 Finally, a bread with some real character! Who could not like the chewy, toothsome, and not to mention the wholesomeness of multigrain bread. Multigrain bread is bread made with multiple grains such as oats, cracked wheat, buckwheat, barley, millet and flax. Some multigrain bread is also whole grain bread. Yet all multigrain breads are not necessarily whole grain breads as found in this next bread in The Breadbakers Apprentice book. I have played around with many multigrain recipes, but this one is uses both brown sugar and honey, and since it also uses "bread flour", it delivered a slightly lighter, and sweeter loaf. Reinhart suggests toasting the slices because the sugars in the bread then caramelizes into a beautiful golden color. If you have been following along in this challenge and you have your own copy of the book, turn to page 187. Otherwise, you can find a version here. 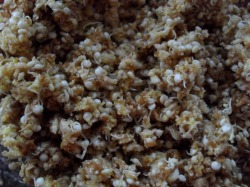 Beautiful quinoa unraveling As usual, Reinhart gives a soaker to soften and release enzymes in the "multi" grains used in the bread the night before. I used a combination of quinoa, cornmeal, and wheat bran. 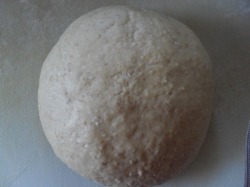 The next morning, I assembled the ingredients together and tried to mix. The dough was stickier than most so I ended up adding more flour to get a cohesive ball, but eventually, it did come together. 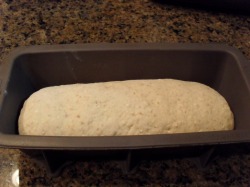 After the initial rise the dough was then punched down and formed into a loaf and into a 9" pan. 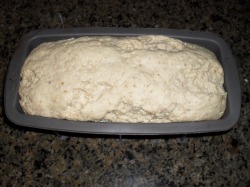 After about 90 mins, this is what I got. You can see the dough had cracked and split in several places. I am not sure what could have caused that to happen, so if anyone can shed some light, I would really like to know. I just sprayed with water and then topped it with poppy seeds anyway, and baked. 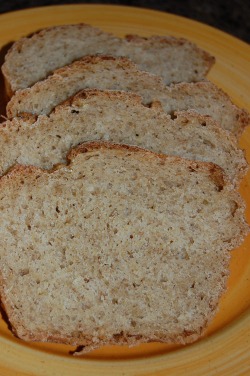 This was a delicious recipe, although, my loaf looked a little "rustic", it still tasted quite delicious. The texture was pleasantly "lighter" than 100%whole wheat multigrain, and I could definitely taste the honey. Mr Reinhart was right, it was divine toasted with butter the next morning. Another for yeastpotting.
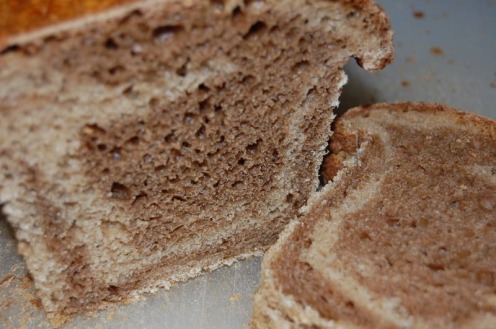 So here I am at bread number 19 out of the Breadbaker's Apprentice book, and if you have been keeping up with these blogs you know the rules of the Challenge already. Nicole from Pinch My Salt did a beautiful marbled loaf that looks too gorgeous to even eat, and I think that she used the caramel color to get that dramatic look. I used the coffee/cocoa substitution instead of the caramel color, and the contrast was definitely not so striking. As I am baking my way through all the recipes, I have noticed that my starter seem to react differently from each type of flour used in incorporating it-- weird. If you don't want to buy the book, you can find the recipe here. 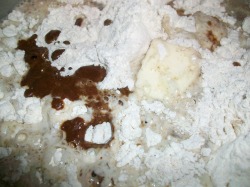 First, I made the darker dough with the coffee/cocoa mix I combined all the ingredients together in my mixer and mixed until it came together into a uniform ball. 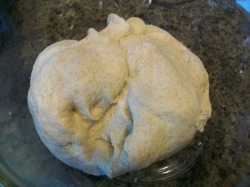 I made the same dough again, but left out the coffee/cocoa mix. Of course, this is my lighter rye.  Here are the two loaves left to bulk rise. 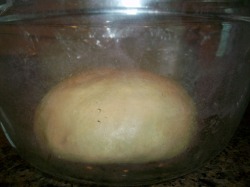 When the dough doubles in size go to Elizabeth's site to see how she gets the marbling on her bread. 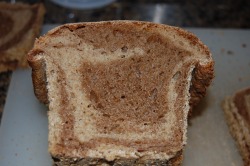 Out of the oven and sliced, this was more impressive than I thought it would be, and although I still am not a rye lover, I will send it over to yeastpotting.
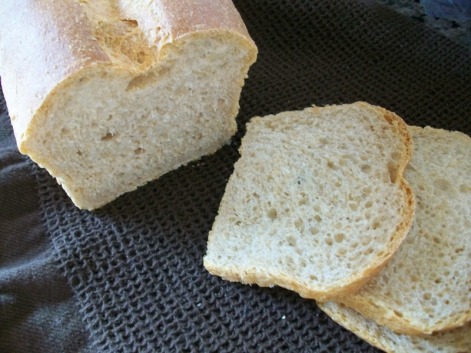 I was really excited when this next bread was next in line for the Breadbakers Apprentice Challege. I really like the nutty, earthy, and wheaty taste of whole wheat, but this bread was NOT the kind of wheat bread for wheat lovers like me. However, if you are into a wheat bread that only slightly resembles wheat, then this is the bread for you. I found the taste and texture more like a white bread with only a hint of wheat flavor and a little honey. 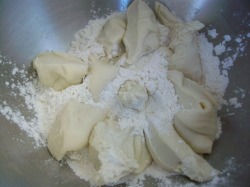 Here are the ingredients: 1-1/4 cups water, at room temperature 2 tablespoons shortening 3 tablespoons non-fat dry milk 1-1/2 teaspoons salt 2 tablespoons sugar 3 tablespoons honey 2-1/2 cups bread flour 1-1/2 cups whole-wheat flour 1 cup of Adam(my wild yeast)  The First Rise 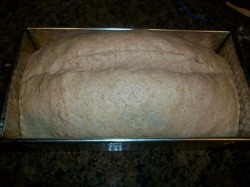 I then divided the dough and made two loaves in 8.5 inch loaf pans. 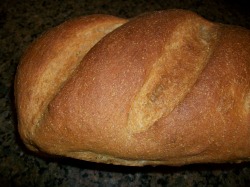 The golden color was a beautiful sight. Should this photo be yeastpotted? 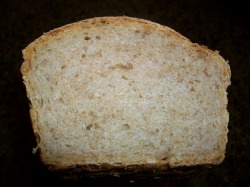 The crumb wasn't too bad either.
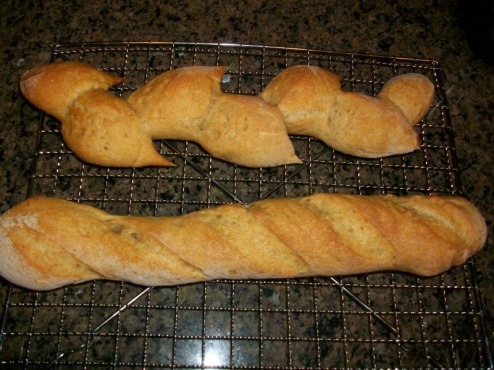
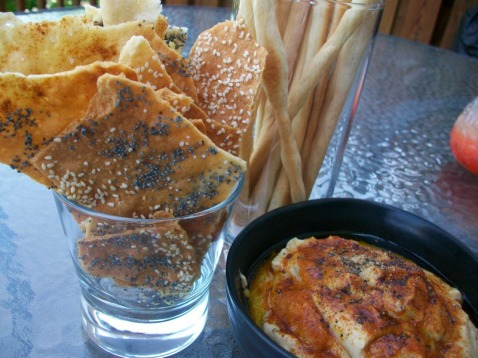 I absolutely LOVE Lavash Crackers. And I was really glad that Peter Reinhart included one in his book The Breadbaker's Apprentice. This is recipe #17 in his book and as per the rules of the Bba Challenge, I cannot post the recipe, but if you don't have the book, you can find the recipe here. The origins are credited to Armenia where the delicious flatbread is traditionally rolled thicker and cooked in a Tandoor oven. And although lavash flatbread is delicious, the cracker... well, in my opinion, is the epitome of texture and taste! I have to admit, I wondered what the yeast would do to the crackers, but the slight rise only contributed to the bubbling and the more tender taste of the final product. I have read many other blogs out there who didn't like this recipe, but I halved the recipe, and divided the dough again in the end, because the dough had to be rolled ultra thin to make the flatbread. I took the other half and formed some grissini. If you have any doubts about this recipe, make half, and roll it out "paper" thin and I am sure you won't be disappointed! 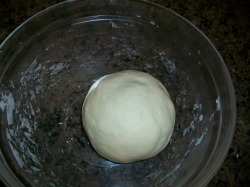 Here is the finished dough ready for the initial rise. I let the ball of dough ferment until it doubled in size 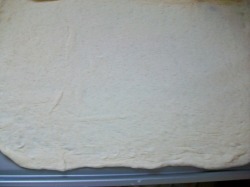 I divided the dough in half(remember, I halved the recipe as well), and rolled one half super thin to get a cracker consistency at the end. This is the secret to a really successful yeast cracker. 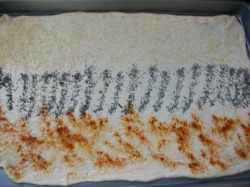 I then topped the rolled dough with poppy seeds, sesame seeds, paprika, and sea salt. Reinhart gives the option of sprinkling caraway seeds also, but, I am not personally fond of those. 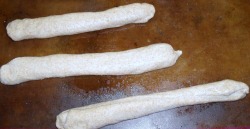 I also made some grissini from the left over dough which actually turned out wonderful. 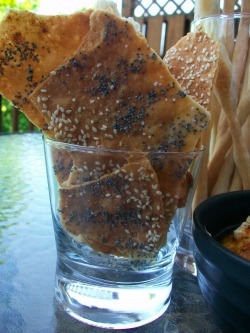 Delicious and wonderful with hummus! A must try and again good enough for yeastspotting.
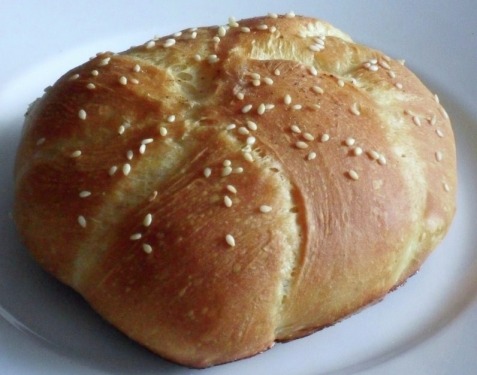 The Kaiser roll, also called Vienna roll, is a crisp crusted roll the size of a hamburger bun. It was supposedly created in Vienna, and is thought to have been named to honor Emperor Franz Josef. Also known simply as a hard roll. Today, we typically associate the roll by the star shape on top, and it is simply a glorious vehicle to use as a coat for delicious sandwiches. I can't say that I have ever really liked these rolls until now. Somehow baking them fresh from your oven just makes them taste better! Since I am participating in the Breadbakers Apprentice Challege, I am not supposed to post the recipe, but once again, someone else has so you can find the recipe here 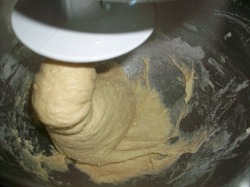 kneading with dough hook I started out with the ingredients: flour, water, egg, Adam(my wild yeast), salt, shortening, and barley malt syrup. Mixed up everything until came together in a ball and then proceeded to use dough hook on med for about 4-6 mins. 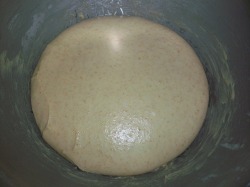 first proofing The dough is left to rise 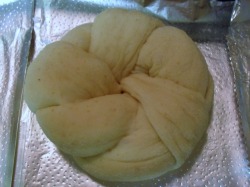 knotted dough I then divided the dough into 8 pieces and rolled and knotted them as you can see here. 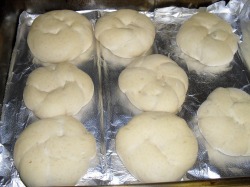 puffed knotted rolls The rolls were then left to rise, and they puffed up beautifully. I then brushed each roll with milk and topped them with sesame seeds. 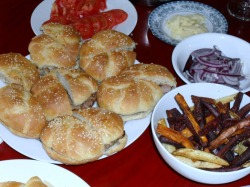 delicious as burgers The Kaiser rolls were delicious as burger buns, and I shared them with my sis and her family. They didn't last very long! yet another one for yeastspotting.
 Since I did French bread last week, I have been wondering what the difference is between Italian bread and French bread, and so here I am at bread number 15 in the book : Breadbaker's Apprentice. Although we usually consider Italian bread to be softer than french bread, Peter Reinhart gives the difference between the two as being very little; since Italians seem to use an old dough(biga) method very closely resembling the pate fermentee used by the French. In his recipe found here, Reinhart has also recommended the use of diastatic barley malt, only I couldn't find any locally, so I went with using the barley malt syrup. I have to say, however, that that little flavor difference made all the difference in the world to our tastebuds. Nic, being Italian, said that this bread was WAY better than the so called Italian breads found here in the US supermarkets. I'll be sending this also over to yeastspotting. 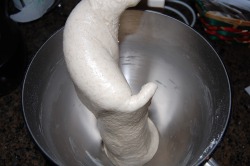 The dough was mixed up with the biga and the wild yeast(Adam) until it formed a smooth dough. 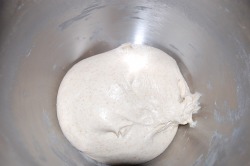 Here is the dough ready for the first bulk ferment. 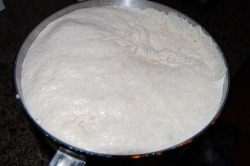 Wow! It actually rose and almost bubbled out of the bowl. I think the temp was a little too warm! 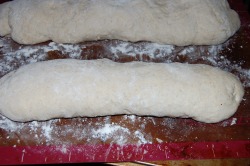 So, Here are the formed loaves ready to be proofed again and baked in the oven. 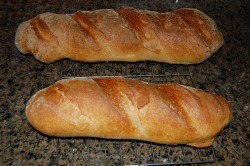 The loaves came out deliciously brown and oh so crusty. The addition of the barley malt syrup was definitely key. We ate the loaves so fast, that I forgot to take a crumb shot.
 Baking french style bread according to Peter Reinhart's recipe is all about preferments. In fact, In his Bread Baker's Apprentice book, He describes the bread as being a lean dough that is about 70% old dough. It's quite amazing how passionate the French are about their bread, but when you taste a home-made loaf, I think you could understand the passion. I adored this bread and want to share it with yeastpotting. 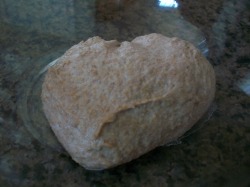 Here is the preferment after being taken out of the fridge. 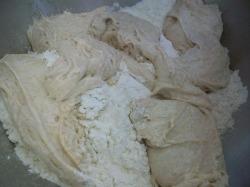 Mixed in the pate fermentee with the flour, salt, water and more wild yeast starter. 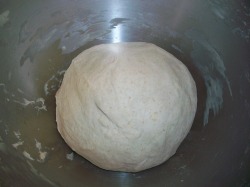 The sticky dough left to rest and rise. Since I use wild yeast, the rising took a little longer than usual.  After about 3 hours, the dough was separated and then made into the banneton and the epi as seen here. 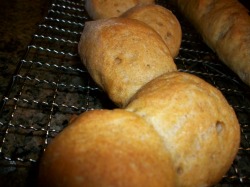 The finished epi out of the oven. The crust was a beautiful golden color, and the taste was divine. I will be making this one again for sure!
 I have yet to come across a person who hates focaccia. Although this simple pizza-like bread comes to us from the region of Liguria, Italy, we have adopted this delicious treat to fit our own American lifestyles. Traditionally, focaccia is topped with savory items such as cheese, herbs, and such, but Peter Reinhart has also included a sweeter version in his book for those of us who can't seem to get enough already. I couldn't decide whether to do a sweet or a savory one, so I chose to make one of each. As you know if you have been keeping up, we are strongly advised against printing the recipe but If you are following along in the Book, you can find the recipe on pp159-167. You can also see what others are doing with this challenge. 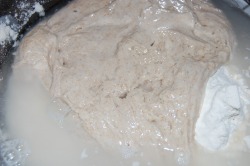 raw ingredients Mixed together: Flour, water, yeast(Adam),lots of olive oil, and salt. 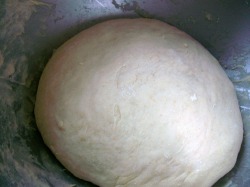 ball of dough It formed a somewhat sticky ball to rest for 30 minutes before I separated into two rectangles. 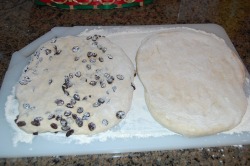 waiting for the intial rise I took half of the dough and incorporated 1 cup of raisins, and I then followed Peter's instructions for folding the dough every hour for about 3 hours, being careful not to degass the dough too much after each rise. 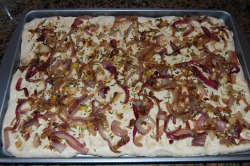 carmelized onions, rosemary and the extra oil The savory dough was then topped with some carmelized onions, rosemary, and the extra 1/4 cup of olive oil then put into pans and into plastic bags to retard overnight in the refrigerator. 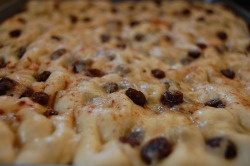 raisin focaccia after the refrigerator The next day, the risen dough was left out to come to room temp and double in bulk(this took about 3 hours). 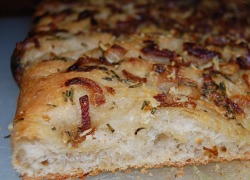 savory focaccia ready to eat The focaccia was then baked in a preheated 500 degree oven and then turned down to 450 degrees for 20 minutes.
| About Me
I am an amateur home maker who finds great pleasure in creating baked wonders in the kitchen. Favorite links
doughadear ArchivesMarch 2011 CategoriesAll |
 RSS Feed