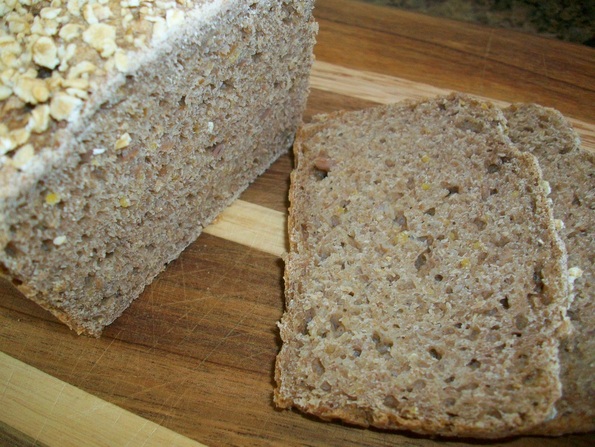
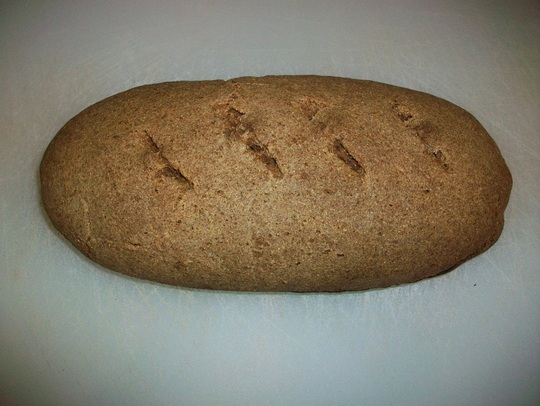
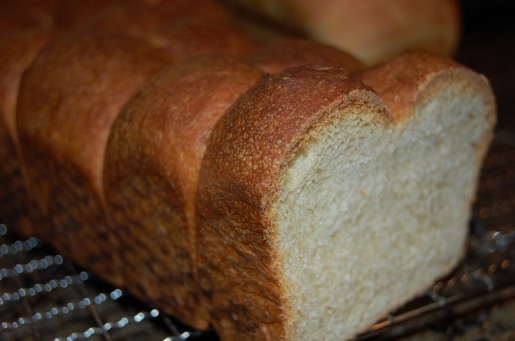
 We love the taste of whole wheat bread, but because of it's density, I hardly ever make it. This is bread number 41 in the challenge and on page of the Bread Bake's Apprentice, by Peter Reinhart. Reinhart tells the story of wheat bread being the reason for his bread beginnings thirty something years ago, and how complex it can be to actually extract wonderful flavors without leaving a "grassy" or bitter aftertaste. I was in fact inspired by Reinhart's journey in discovering ways of improving flavors from whole wheat and so also obtained a copy of his Whole Grains book. Getting back to the subject at hand, in this particular recipe, there is the use of both a soaker and a poolish or biga, in which the longer fermentaion is supposed to balance out the bitter/grassy notes in the whole grain and improve the crumb somehow. 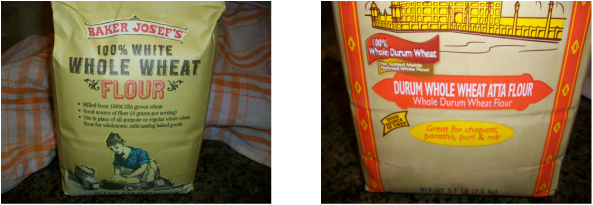 When I first began to think about this recipe, I decided to try a combination of whole wheat flours to see if there was any difference in flavor. I had a new bag of Trader Joe's white whole wheat, and a fairly new bag of whole wheat durum flour that I thought would make for an interesting mix. 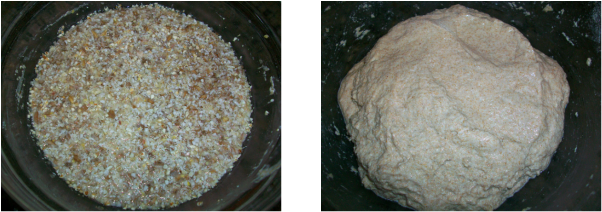 The actual recipe calls for both a soaker of whole grains ( I used the two flours and threw in some corn grits for texture), and a biga. The Biga was actually my wild yeast that was increased to make the appropriate amount for this recipe. 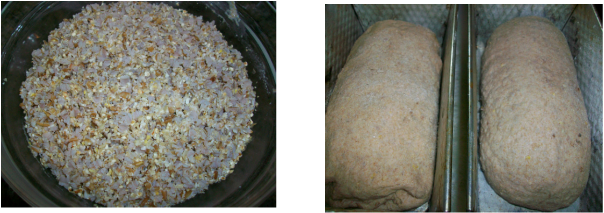 The grains looked full and opened up a great deal after the soak. I combined the rest of the ingredients to make a typical bread dough and let it bulk rise until it doubled in size. The dough was then divided in half to make to loaves and placed inside bread pans. 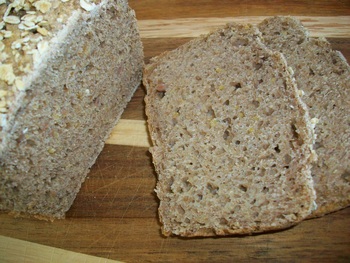 The resulting bread was actually a lot heavier and dense than I had hoped for, but the the rustic looking loaves had a wonderful tangy taste and was delicious with soups and salads. I will try this again but use different wheat grains next time.
Yeastpotted.
1 Comment
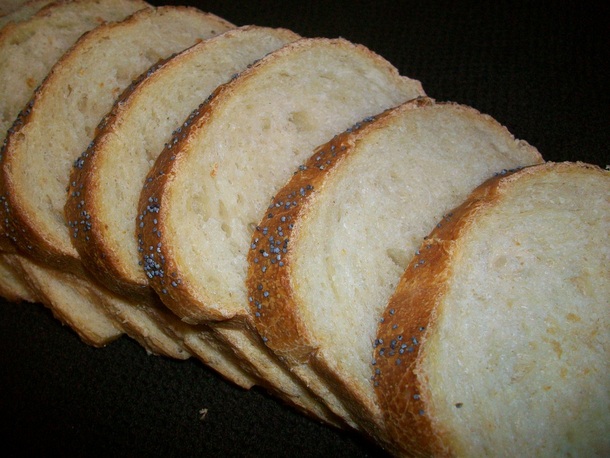 Moving right along, we are at bread #40 in the Bread Baker's Apprentice book, and I can say that I see the light at the end. (I can also certainly say that i was not incredibly excited about tackling this bread, since most white breads have a very boring flavor profile to me.) I have made plenty of white breads in the past, and so I just knew that this was going to be an ordinary loaf. However, since I am only using my wild yeast starter as the sole leavening agent, I was very curious to see what would happen to the flavor and texture once the longer fermentation process was implemented. I chose to tackle variation 3, since it involved a preferment and I was using my sourdough as my leavening agent. Since I am participating in the BBA Challenge, I cannot post the recipe, but someone has posted the recipe for variation 2 here. 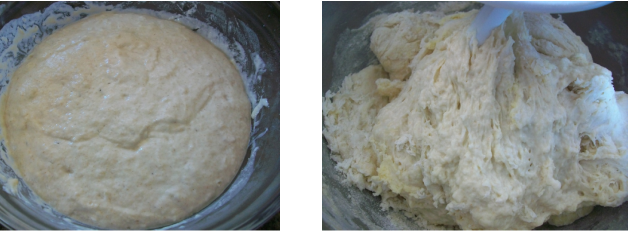 This bread actually involved a preferment (A pre-ferment and a longer fermentation in the bread-making process have several benefits: there is more time for yeast, enzyme and, if sourdough, bacterial actions on the starch and proteins in the dough, thereby creating greater complexities of flavor), egg yolk, sugar, and butter to enrich the dough. 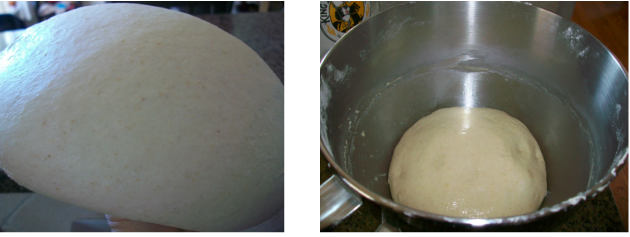 After kneading the ingredients together to get a soft dough that window-paned, it was then rolled in an oiled bowl(I used the same mixing bowl) and covered to let double in bulk. 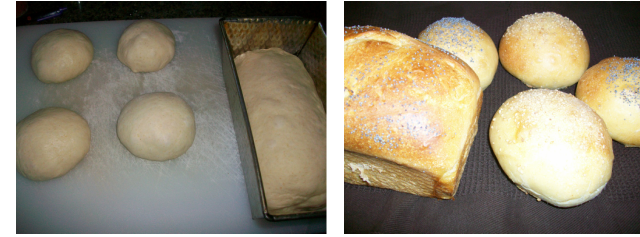 The dough was divided after fermenting and shaped into a loaf and 4 sandwich buns. I opted to sprinkle the top with poppy seeds.
The verdict? Well, let's just say that this was the BEST white bread we have ever eaten. The sponge or preferment, really gave the bread wonderful flavor, and the fat from the butter and egg yolk softened the crumb which gave a more delicate texture. What a wonderful surprise! yeastpotted. 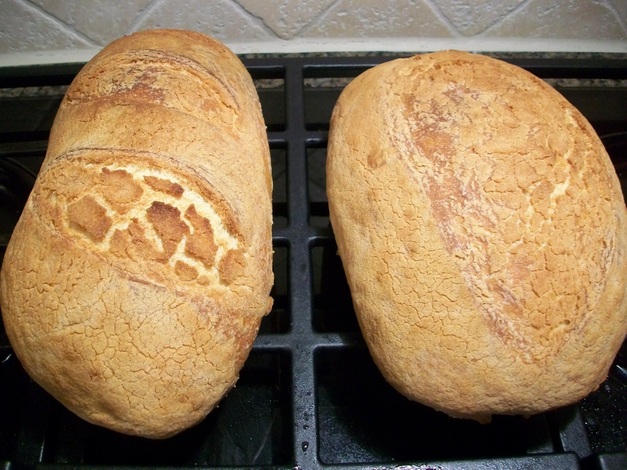 Here we are at BBA bread number 39 in the challenge and it's Vienna Bread. Developed in Vienna, Austria, Vienna bread is baked by using ovens that are injected with steam as the bread bakes to add moisture to the crumb of the bread. As the bread bakes with the moisture, the surrounding crust becomes lightly browned, slightly crisp, and flaky in texture while the crumb remains soft. Vienna bread is typically produced as an oblong loaf of bread, but is also available in other shapes. However, as a longer type of loaf, it is a bread that has been attributed with being the origination of French bread, as bakers in France attempted to adopt the steam method of producing their French baguettes. This bread was definitely not a french style, but an enriched loaf with a really beautiful glaze. I was enthusiastic about the addition of the dutch crumb topping and loved the way the loaves looked when finished. You can follow along on page 261 of the book: The Bread Baker's Apprentice or you can find an adapted recipe here.  preferment on the left and finished dough on the right This is another two day bread where the day before baking the bread, a preferment is used for flavor. This was an enriched dough as well, for it contained egg, butter, sugar, and barley malt or powder. (I had the malt, so I used it.) The finished dough came together fairly quickly and I was soon able to get it to windowpane, where it was then put into an oiled bowl to rise until it doubled in bulk. 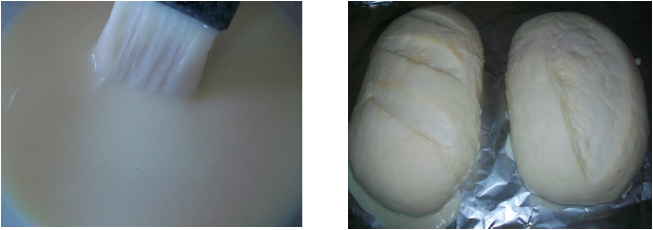 After the first rise, the dough was then divided into two and shaped into batards. In the meantime, I made the dutch crumb glaze and brushed it over the scored loaves. The loaves were then left to rise again until doubled in size. They were then baked in the oven with steam to create the wonderful crust that this bread is famous for. 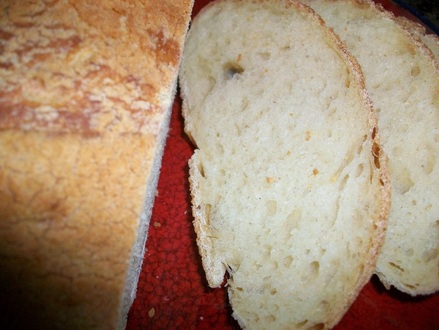 This technique resulted in a light and airy bread crumb that not only looked beautiful, but tasted wonderful as well. It reminded me a lot of a lower fat challah bread, and toasted up really nicely as a vehicle for Nutella. Yummmmm!
Yeaspotted. 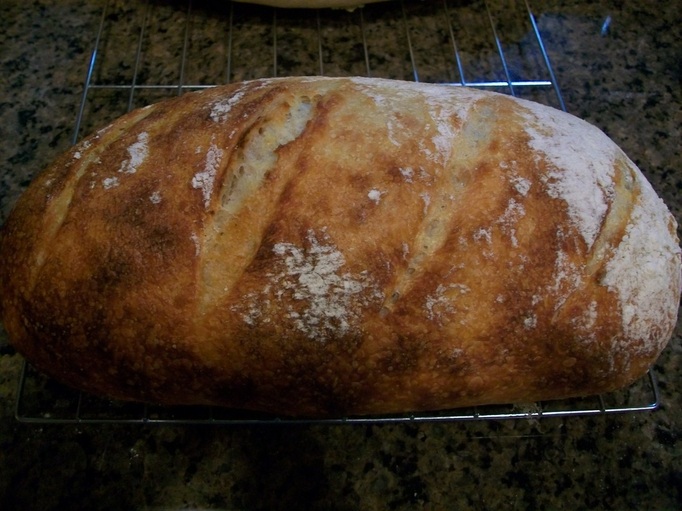 Legend has it that, in 1100, in an attempt to force Florence to surrender in one of their endless battles against each other, nearby Pisa blockaded the salt that arrived at her port, preventing it from reaching Florence. Thus, pane toscano (Tuscan bread) was born - the bread famous throughout Italy for being 'sciocco', from the word in the Tuscan dialect for ‘unsalted’. This is just one of the legends, (but my favorite) that tells of the origins of this saltless wonder. While we were in Florence a few years ago, My husband (who is first generation Italian) introduced me to this peculiar bread, and much to my surprise, I loved it! So, I was worried when I got to this bread because so many of the BBA Challengers who went before me really disliked it. Boy was I amazed! Not only did I love this bread, it was ABSOLUTELY my favorite thus far. The crust was deliciously crisp and the crumb was incredibly chewy with a slight sweetness and tang that seemed to permeate and change with every bite. This was a bread experience like I have only dreamed of having from one of my own baked goods, and my husband agreed that this was an exceptional bread. If you are following along with me, you know that I have been baking my way through The Bread Baker's Apprentice by Peter Reinhart using only wild yeast starter as my leaven. This is bread 38 and the recipe is on page 259, but if you still haven't picked up a copy, Susan at WildYeast has a gread adapted version. 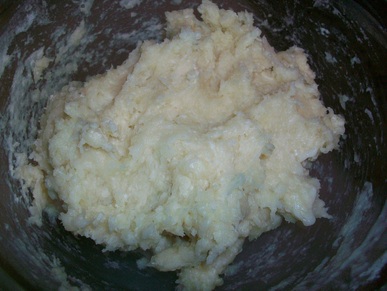 This is another two day bread, but it uses a fascinating method to 'scald' flour using boiling water to gelatinize the starches and to encourage more enzyme activity. I have never seen this method before but according to Reinhart, it can be applied to many of the lean dough recipes so far. This approach really intrigued me, so I will be experimenting with this new-found technique in the near future. 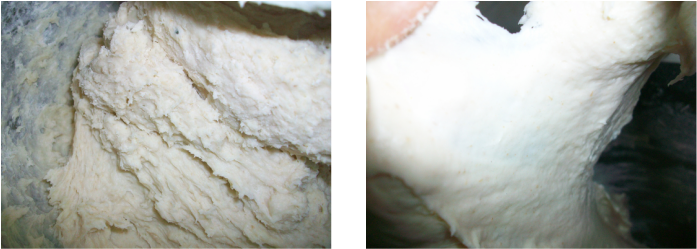 The actual kneading process of the finished dough was a little more difficult than some of the other breads so far. I found the dough to be VERY goopy and lumpy in the beginning stages of mixing, and I noticed that the time it actually took to reach the desired dough consistency and temperature took much longer than I anticipated, and I thought my poor mixer would give out before it did. 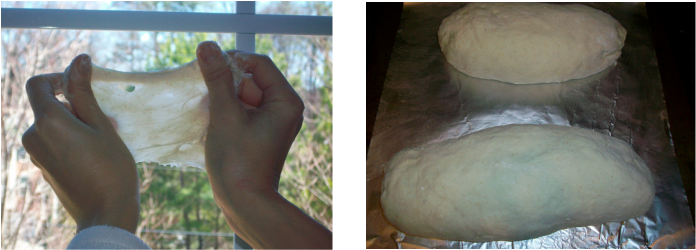 Finally, The dough got to a kind of 'windowpane' stage and I proceeded with the rest of the bulk fermentation. If you have been following along my blog, you will notice that I am trying to use a wild yeast starter exclusively while baking through Reinhart's book, and even though I did not use any salt in this bread, it took forever to double in size(I keep telling myself that patience is a virtue). Even when forming into batards, the second rising seemed to take much longer to rise also. The long fermentation may have had much to do with the final flavor profile of this recipe, for we were rewarded in the end when the bread turned out so delicious. 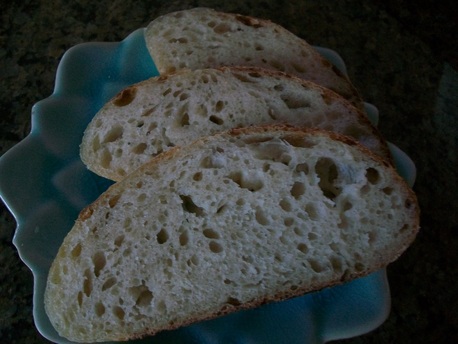 The crumb was really outstanding; it had the chewiness of really good sourdough(maybe because of my wild yeast starter, or the water bath in the cold oven, or even the long fermentation) and the flavor was a little tangy, a little sweet, and a little creamy. Whatever the reason for being so incredibly yummy, I am happy that it happened. I can say without a doubt that this bread will be made VERY often in our home.
yeastpotted 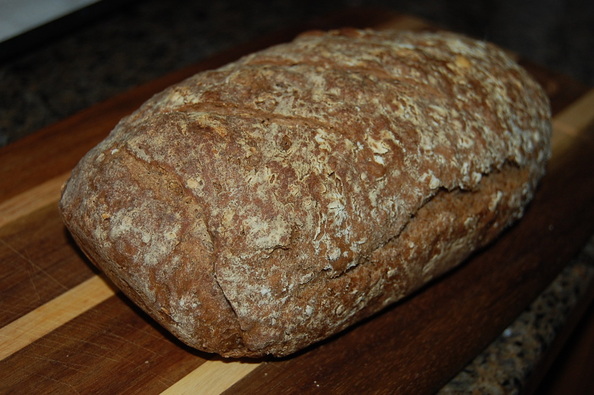 So, here is another rye recipe from The Bread Baker's Apprentice. I am one of many people across the online community of bakers who is participating in the BBA Challenge, only I am planning to do all if not most of the bread recipes using wild yeast only. As per the rules of the challenge, I am not posting the recipe but in case you still don't have your copy of the book you can find an adapted version here. This is bread number 34, and If you have been keeping up, I have been really impressed by the rye bread recipes so far. Not being a huge fan of rye breads in the past, I am slowly re-thinking my distaste for rye breads. I always thought of Pumpernickel bread as being dark from the color of the rye itself, but it appears that is not the case at all. 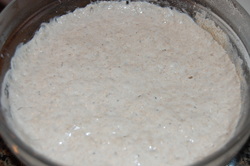 This is a 2 day bread using a wild yeast starter, and in my case ONLY wild yeast. "Adam", (my wild yeast) was refreshed and bubbled away like a champ. 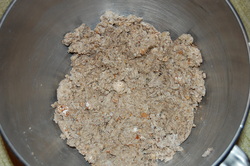 The recipe also says to use bread crumbs,preferably rye bread crumbs. I had some leftover rye bread from the previous rye bread and toasted and then ground coarsely for texture as was recommended by Reinhart. 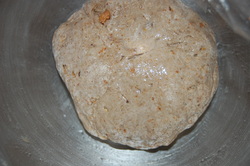 Here is the final dough kneaded and oiled-- ready for the initial rise. This one was also not over-kneaded so as not to make the rye become "gummy". 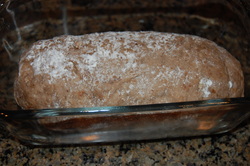 The second rise took forever. I waited for 7 hours before putting the loaf into the oven, and it still didn't have an impressive rise. I don't know if that is the nature of rye flour or not, but so far, none of the rye breads had an impressive spring. 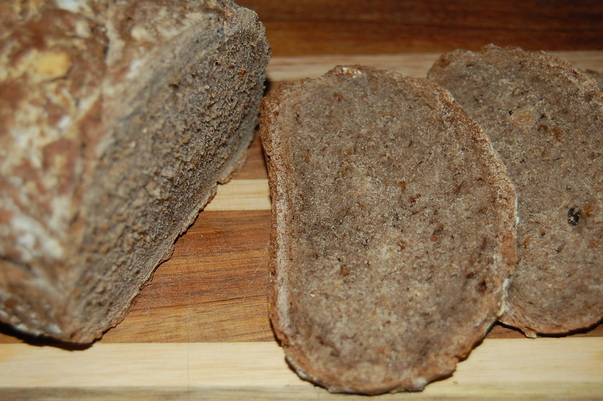 This loaf was very chewy and dense with a heavy crumb. I now understand why as a kid I always saw pumpernickel breads sliced so thin. Also, Reinhart was absolutely spot on about the addition of day old bread to improve the texture, which seemed give a interesting crunch that was unexpected. The tasty loaf was probably my favorite so far and quite difficult to resist when hot from the oven. yeastspotted.
 This bread was a little misleading. If you want the bread to be totally all rye, then your barm has to be made from all rye. I use "Adam" (my wild yeast sourdough starter), and it is made of 100% whole wheat. At any rate, to say that this bread is dense, is an understatement. I have so little experience using rye flour and as per Reinhart's instructions, I tried to knead the dough as little as possible without kneading too much. It was definitely harder than I thought. However, to be quite honest, the flavor really surprised me. The rye had an almost "sweet" and creamy taste and texture and I have to say, it was less offensive than I thought it would be. So, if you are like me, and have a dislike for rye, this might be a good recipe to try. You can follow along in the book(The Breadbaker's Apprentice) on page 239, or if not, try to see it here. 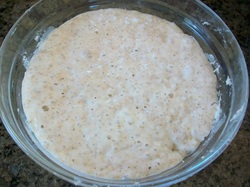 Here is my starter, Adam bubbling away once again. Adam is actually a whole wheat starter culture, but I refreshed him using rye flour. The initial "barm" as Peter calls it only a half cup, and that's the only non-rye ingredient involved otherwise. If you are a purist, he tells you how to make a barm using only rye flour here. 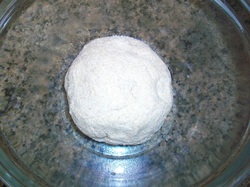 Here is the final dough after mixing the starter with the soaker(half cup rye flour and half cup water left overnight) and the remaining ingredients. In the book, Peter explains that you can actually knead the dough too much because the rye has far less gluten than wheat. You will find that the actual kneading will be stickier than most of the breads that you are used to making. 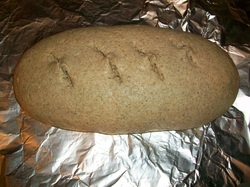 So in the end, the shaped loaf has not risen much-- only about 1.5 times larger. I found also that there was not much oven spring in the final baking of the bread as well. However, the taste was way better than expected.
 Mmmmmmm. Sweet bread. When I got to do this bread, I was so excited to be making what I've always known it as Hawaiian bread. I grew up eating King's Hawaiian bread in the orange labeled bag and never dreamed that I would one day make it myself. To be perfectly clear, this was NOT your grocery bagged Hawaiian bread. No, this was SO much more delicious than what I had been eating all those years. Thank goodness for those Portuguese immigrants who graced us with this delicious treat. The funny thing is that Susan from Wild Yeast blog also made this bread this week, but her version is a little different. I think I will try her recipe the next time I make sweet bread, since she always has such mouth-watering photos. Reinhart's bread is actually a one day event, but since I used wild yeast, it took me two days to make. This particular recipe is on page 215 in the Breadbaker's Apprentice Book, and bread #27 in the Challenge. If you are a fan of Hawaiian bread, then you MUST try this recipe, and if you are still without the book you can find the recipe here.  For this recipe, I took out a frozen piece of Adam(my starter), and brought it to room temp before mixing my sponge.  Sponge bubbling away nicely  The really interesting aspect of this recipe is the addition of powdered milk in which Reinhart swears is the key in this recipe. I then mixed all the ingredients for the dough together until I had a soft, silky, ball.  The dough was then allowed to rest and rise until doubled in bulk. 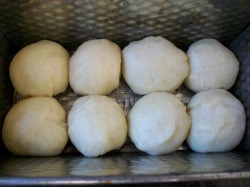 Then the dough was separated and formed into this loaf. I merely made 8 small balls and dropped them into the loaf pan. The second rise was a little faster. 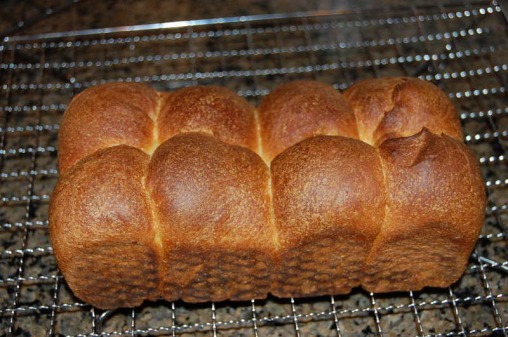 The resulting loaf was not only beautiful to look at, but really delicious as well. Don't be put off by the dark color of the bread. Reinhart explains that it's the high amount of sugar in the dough that makes the bread turn a "rich mahogany brown". This is a definite keeper in the book for me. Yeastpotted
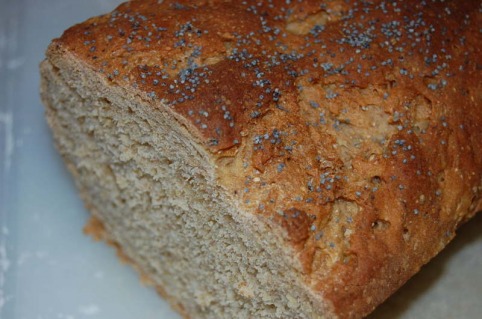 Finally, a bread with some real character! Who could not like the chewy, toothsome, and not to mention the wholesomeness of multigrain bread. Multigrain bread is bread made with multiple grains such as oats, cracked wheat, buckwheat, barley, millet and flax. Some multigrain bread is also whole grain bread. Yet all multigrain breads are not necessarily whole grain breads as found in this next bread in The Breadbakers Apprentice book. I have played around with many multigrain recipes, but this one is uses both brown sugar and honey, and since it also uses "bread flour", it delivered a slightly lighter, and sweeter loaf. Reinhart suggests toasting the slices because the sugars in the bread then caramelizes into a beautiful golden color. If you have been following along in this challenge and you have your own copy of the book, turn to page 187. Otherwise, you can find a version here. 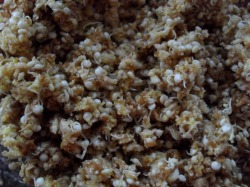 Beautiful quinoa unraveling As usual, Reinhart gives a soaker to soften and release enzymes in the "multi" grains used in the bread the night before. I used a combination of quinoa, cornmeal, and wheat bran. 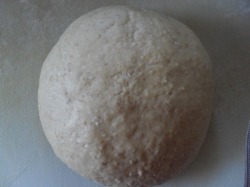 The next morning, I assembled the ingredients together and tried to mix. The dough was stickier than most so I ended up adding more flour to get a cohesive ball, but eventually, it did come together. 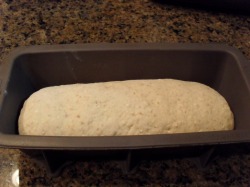 After the initial rise the dough was then punched down and formed into a loaf and into a 9" pan. 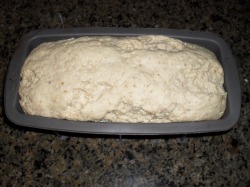 After about 90 mins, this is what I got. You can see the dough had cracked and split in several places. I am not sure what could have caused that to happen, so if anyone can shed some light, I would really like to know. I just sprayed with water and then topped it with poppy seeds anyway, and baked. 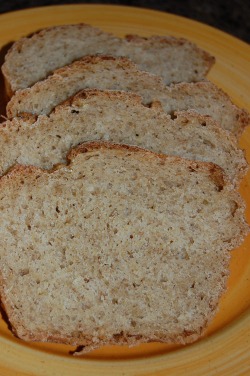 This was a delicious recipe, although, my loaf looked a little "rustic", it still tasted quite delicious. The texture was pleasantly "lighter" than 100%whole wheat multigrain, and I could definitely taste the honey. Mr Reinhart was right, it was divine toasted with butter the next morning. Another for yeastpotting.
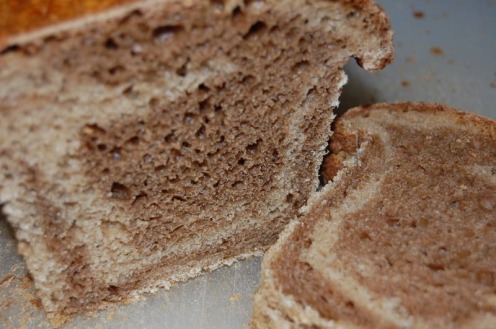 So here I am at bread number 19 out of the Breadbaker's Apprentice book, and if you have been keeping up with these blogs you know the rules of the Challenge already. Nicole from Pinch My Salt did a beautiful marbled loaf that looks too gorgeous to even eat, and I think that she used the caramel color to get that dramatic look. I used the coffee/cocoa substitution instead of the caramel color, and the contrast was definitely not so striking. As I am baking my way through all the recipes, I have noticed that my starter seem to react differently from each type of flour used in incorporating it-- weird. If you don't want to buy the book, you can find the recipe here. 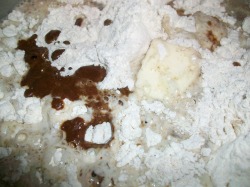 First, I made the darker dough with the coffee/cocoa mix I combined all the ingredients together in my mixer and mixed until it came together into a uniform ball. 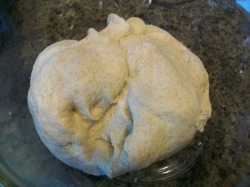 I made the same dough again, but left out the coffee/cocoa mix. Of course, this is my lighter rye.  Here are the two loaves left to bulk rise. 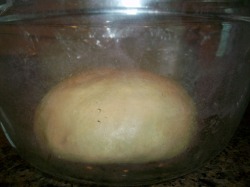 When the dough doubles in size go to Elizabeth's site to see how she gets the marbling on her bread. 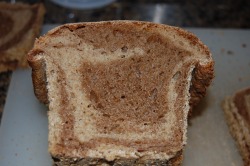 Out of the oven and sliced, this was more impressive than I thought it would be, and although I still am not a rye lover, I will send it over to yeastpotting.
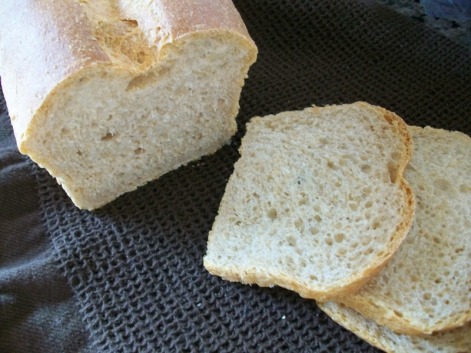 I was really excited when this next bread was next in line for the Breadbakers Apprentice Challege. I really like the nutty, earthy, and wheaty taste of whole wheat, but this bread was NOT the kind of wheat bread for wheat lovers like me. However, if you are into a wheat bread that only slightly resembles wheat, then this is the bread for you. I found the taste and texture more like a white bread with only a hint of wheat flavor and a little honey. 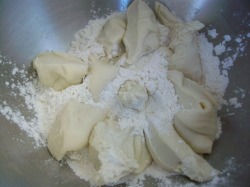 Here are the ingredients: 1-1/4 cups water, at room temperature 2 tablespoons shortening 3 tablespoons non-fat dry milk 1-1/2 teaspoons salt 2 tablespoons sugar 3 tablespoons honey 2-1/2 cups bread flour 1-1/2 cups whole-wheat flour 1 cup of Adam(my wild yeast)  The First Rise 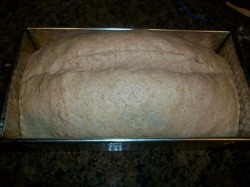 I then divided the dough and made two loaves in 8.5 inch loaf pans. 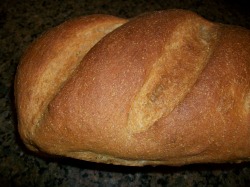 The golden color was a beautiful sight. Should this photo be yeastpotted? 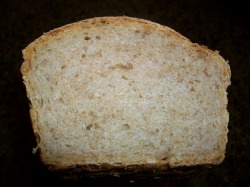 The crumb wasn't too bad either.
| About Me
I am an amateur home maker who finds great pleasure in creating baked wonders in the kitchen. Favorite links
doughadear ArchivesMarch 2011 CategoriesAll |
 RSS Feed