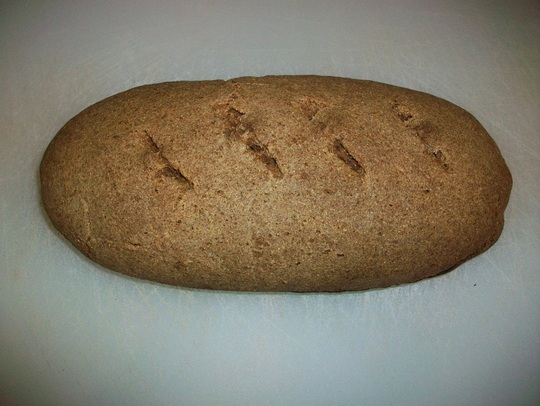
 This bread was a little misleading. If you want the bread to be totally all rye, then your barm has to be made from all rye. I use "Adam" (my wild yeast sourdough starter), and it is made of 100% whole wheat. At any rate, to say that this bread is dense, is an understatement. I have so little experience using rye flour and as per Reinhart's instructions, I tried to knead the dough as little as possible without kneading too much. It was definitely harder than I thought. However, to be quite honest, the flavor really surprised me. The rye had an almost "sweet" and creamy taste and texture and I have to say, it was less offensive than I thought it would be. So, if you are like me, and have a dislike for rye, this might be a good recipe to try. You can follow along in the book(The Breadbaker's Apprentice) on page 239, or if not, try to see it here. 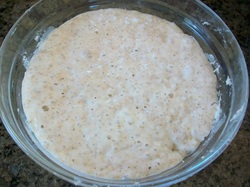 Here is my starter, Adam bubbling away once again. Adam is actually a whole wheat starter culture, but I refreshed him using rye flour. The initial "barm" as Peter calls it only a half cup, and that's the only non-rye ingredient involved otherwise. If you are a purist, he tells you how to make a barm using only rye flour here. 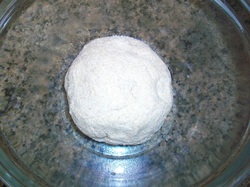 Here is the final dough after mixing the starter with the soaker(half cup rye flour and half cup water left overnight) and the remaining ingredients. In the book, Peter explains that you can actually knead the dough too much because the rye has far less gluten than wheat. You will find that the actual kneading will be stickier than most of the breads that you are used to making. 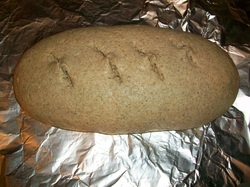 So in the end, the shaped loaf has not risen much-- only about 1.5 times larger. I found also that there was not much oven spring in the final baking of the bread as well. However, the taste was way better than expected.
2 Comments
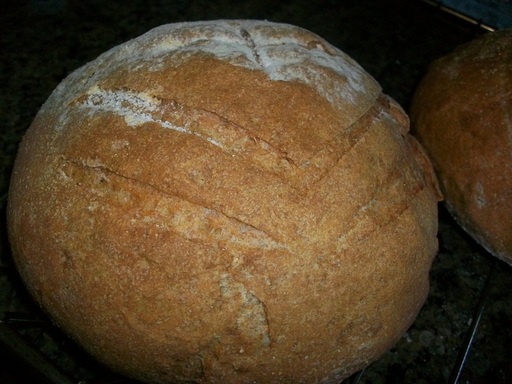
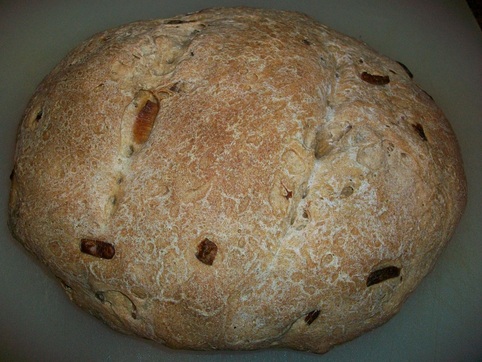 For those of you who know of my keen dislike of rye bread, this particular bread might make me change my attitude just a little. The savory additions of onions really stole the show for me in this particular loaf. If you are still with me from the beginning, you should know that I am baking my way through the book: The Bread Baker's Apprentice by Peter Reinhart, and joining the many others who have embarked on this challenge. My personal twist is that I am attempting to do all of his recipes using only wild yeast. This rye bread is actually not half bad as rye bread goes, but, again, I am not a rye bread fan, and this IS a challenge after all, right? If you are following along in the book, we are now on page 236, or you can find the recipe here. 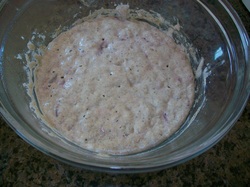 So, this again calls for a starter, or as Peter calls it "barm", but mine's called "Adam". Here is Adam mixed with rye flour and allowed to double in size. 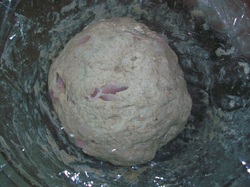 I added the onions and the rest of the ingredients to let it bulk rise. 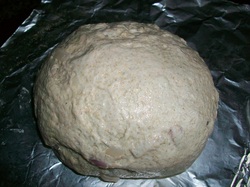 After the bulk rise, the dough was shaped and turned out onto a nonstick surface to rise again before baking. 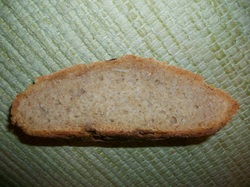 The finished bread-- not so rye tasting and plenty savory.
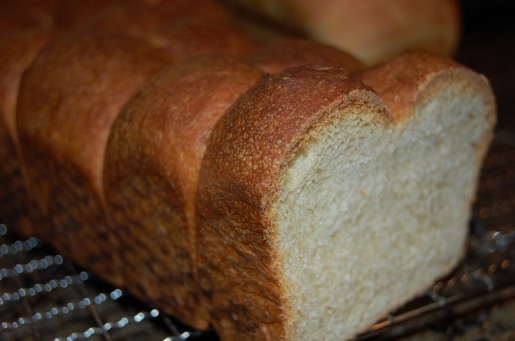
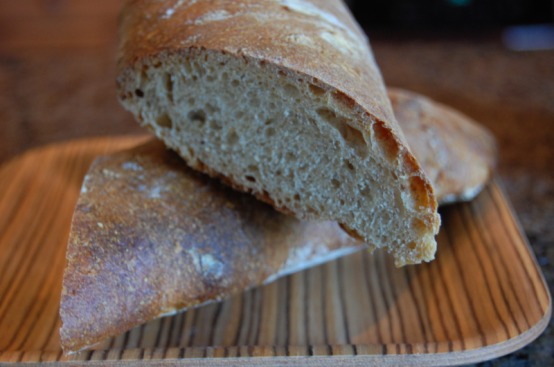
 Did I ever mention how much I just LOVE sourdough? Well, apart from the deliciously tangy and flavorful taste, Did you know that it is actually pretty healthy? It seems that the wild yeast used to produce this wonderful bread actually changes the nature of the starches in the bread and cause less spikes in blood sugar levels; You can read more about this study here. Sourdough breads are traditionally made with a wild starter culture that is "fed" and left to develop the yeast and enzyme activity. These types of breads are usually a bit more high maintenance to make, but the resulting breads are generally far more superior in both the taste and nutritional value. Peter Reinhart's version goes into depth about the making of the seed culture and feeding it to develop the "barm" that is used to make a mother starter. You can read all about this and get the recipe here.  Adam happily bubbling away If you have been following along this challenge with me, you know that I have been using wild yeast the entire time in place of commercial yeast in all the recipes thus far. Here is my starter; "Adam" once again active for his role in the making of the delicious bread. 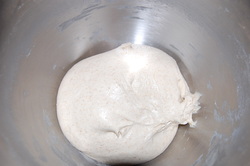 the dough will be a little sticky Here is the mother dough which has the consistency of french bread and needs to be left to rise for about 4 hours or so until it doubles in size. Then it goes into the fridge overnight. 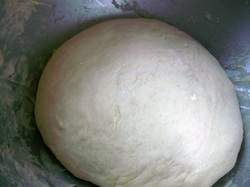 dough ready for the bulk rising The next day I took the mother starter and let it come to room temp for one hour before proceeding. When making the final dough, I substituted whole wheat flour for half the bread flour, to get some beneficial fiber into the mix. I then let it rise again, so they doubled in size before splitting them up into boules. 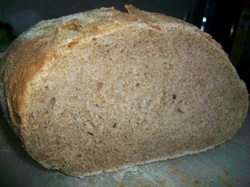 wish you could smell this Somehow I know this photo doesn't really do much justice for this bread. The taste is extraordinary if you like sourdough, and will make you forget how hard you worked to make it.
yeastspotted. 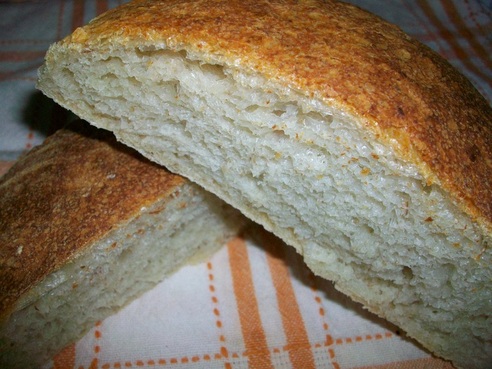 I think Italian breads are probably my favorite breads, but I have never had THIS particular bread, and felt like I have been missing out for years. This bread was wonderful beyond words and the fact that traditionally it is made using all wild yeast is my kinda tune. Pane Pugliese bread is the rustic bread that comes from the heel of the boot in Italy, and now I want to visit there just to try the bread personally! Reinhart describes this bread having similarities to ciabatta explains that the difference between the two is the shape: Pugliese bread is usually a round shape. Peter explains that also the use of golden wheat semolina is used extensively in Pugliese bread baking is the real distinction in the nutty taste. If you have the book, follow along on page 222 or if not, try this link. 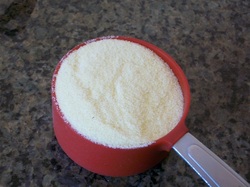 I actually used semolina flour since I couldn't find durum wheat in my area. I only used a fourth of a cup since Reinhart recommends using only up to thirty percent of semolina flour. 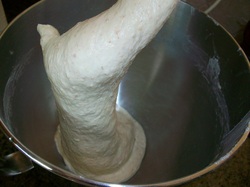 This is a very wet dough-- a lot like making ciabatta. The dough will come together after a few rests and risings as indicated by the recipe. 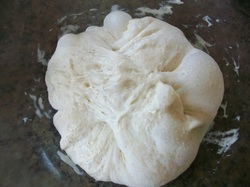 Here is the dough after the second rise and inside of it's final proofing bowl. Reinhart instructs to proof with the seam side UP so the seamless side will be the final exposed side . 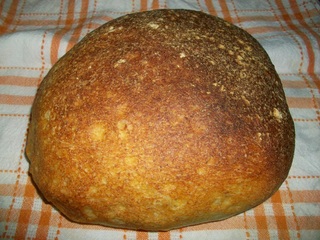 The final loaf came out really golden in color-- I guess that is from the semolina flour. It was absolutely delicious with a chewy and open interior. The crust was supposed to soften a little after coming out of the oven, but the actual loaf didn't last long enough for us to make any comparisons.
yeastpotted 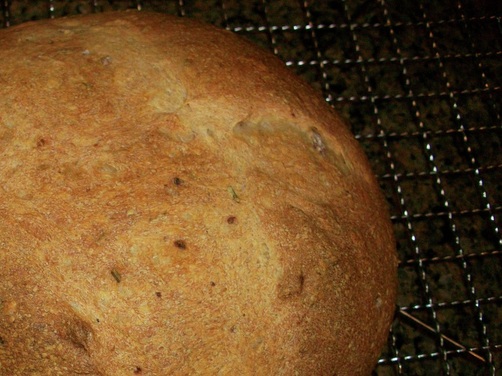 Potatoes and rosemary are two of my favorite ingredients together. So, when I saw that this was the next BBA Challenge bread, I got pretty excited. The rosemary in my garden has also been growing out of control, so at least I could use some of it before throwing most of it away. Peter says that we owe it to the Italians for coming up with this remarkable bread that they call "panmarino", and is a good use for leftover potatoes. Turn to page 219 of the Bread Baker's Apprentice to follow along if you have the book, otherwise, try this link.  This is another 2 day bread that uses a biga, or "old dough" that has been left in the refrigerator overnight. 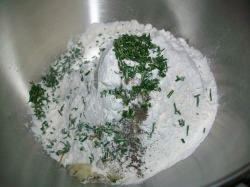 All the ingredients were mixed together the next day until the dough windowpaned. 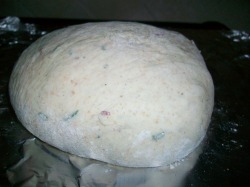 Let the dough bulk rise and then deflate gently and form into whatever shape-- I chose simple round boules. 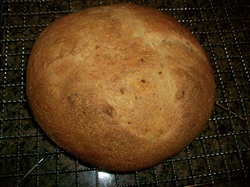 The finished bread fresh out of the oven. Reinhart suggests letting the bread cool one hour before devouring. But since we were smelling this incredible bread perfume our house, we just couldn't wait. 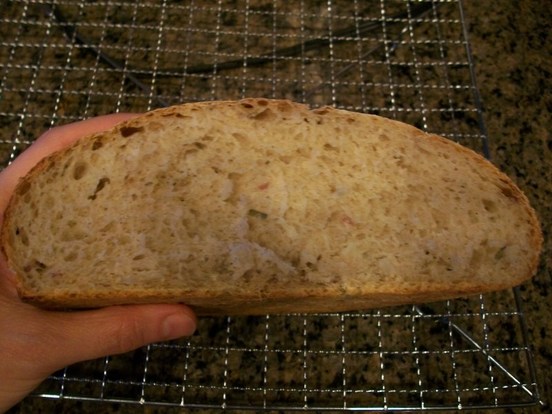 Let me tell you, this bread REALLY is as good as it sounds. It is crusty, and the potato addition really made the crumb super soft and chewy. This loaf is high on my list of breads to visit again soon. Another one for yeastspotting.
 Mmmmmmm. Sweet bread. When I got to do this bread, I was so excited to be making what I've always known it as Hawaiian bread. I grew up eating King's Hawaiian bread in the orange labeled bag and never dreamed that I would one day make it myself. To be perfectly clear, this was NOT your grocery bagged Hawaiian bread. No, this was SO much more delicious than what I had been eating all those years. Thank goodness for those Portuguese immigrants who graced us with this delicious treat. The funny thing is that Susan from Wild Yeast blog also made this bread this week, but her version is a little different. I think I will try her recipe the next time I make sweet bread, since she always has such mouth-watering photos. Reinhart's bread is actually a one day event, but since I used wild yeast, it took me two days to make. This particular recipe is on page 215 in the Breadbaker's Apprentice Book, and bread #27 in the Challenge. If you are a fan of Hawaiian bread, then you MUST try this recipe, and if you are still without the book you can find the recipe here. 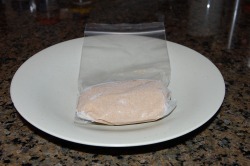 For this recipe, I took out a frozen piece of Adam(my starter), and brought it to room temp before mixing my sponge.  Sponge bubbling away nicely 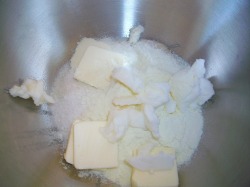 The really interesting aspect of this recipe is the addition of powdered milk in which Reinhart swears is the key in this recipe. I then mixed all the ingredients for the dough together until I had a soft, silky, ball. 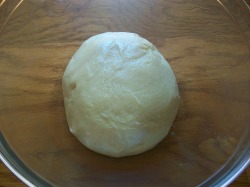 The dough was then allowed to rest and rise until doubled in bulk. 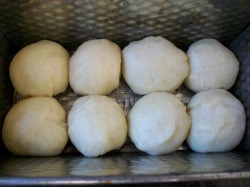 Then the dough was separated and formed into this loaf. I merely made 8 small balls and dropped them into the loaf pan. The second rise was a little faster. 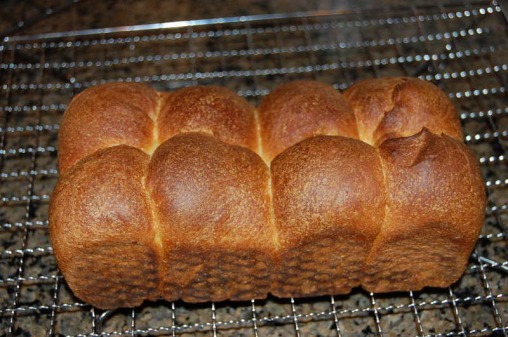 The resulting loaf was not only beautiful to look at, but really delicious as well. Don't be put off by the dark color of the bread. Reinhart explains that it's the high amount of sugar in the dough that makes the bread turn a "rich mahogany brown". This is a definite keeper in the book for me. Yeastpotted
 Seems to me that I have been here before...Hmmm, and, I somehow think this is deja-vu.. Anyway, here is bread #26 in The Breadbaker's Apprentice challenge, and another winning artisan bread recipe from Peter Reinhart's book. In this recipe, Reinhart uses an ingredient called "clear flour", which is something between whole wheat flour and white flour. He has instructions on sifting out the bran in whole wheat flour to get the closest to the real ingredient. There are several types of preferments; sponge, biga, and sourdough are some that may be familiar from past breads, but of the most common and easiest preferments is the poolish, and the star of the show here. Pronounced “poo-LEESH,” the name is thought to derive from the Polish bakers who invented and introduced it to Viennese bakers, who in turn brought it to France. Since similar baguettes had been made previously, I won't bore you with the step by step images since they really are a lot like the past ones. Reinhart says this was the 2nd best baguette he's had, and I have to agree that the taste was not as good as some of the previous baguettes, but it was still better than average bread. In case you still haven't bought the book, you can find the recipe here, and try making these for yourself. yeastspotted.
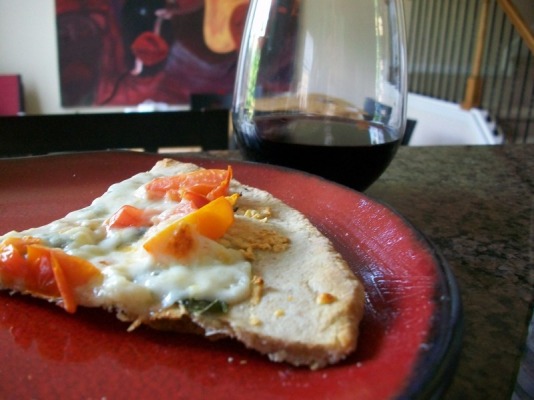 So here we are at bread number 25 in the book Bread baker's Apprentice: Pizza in the Neapolitan style. As you may have heard by now, my hubby is truly first generation Italiano, and so PIZZA is a serious topic for him. We have tried many pizzas all over our city, and there is only ONE place here in the US we go to get true pizza napoletano, and it's Antico Pizza. Having said all that, when this recipe came up, Nic was enthusiastic about trying to duplicate as close to the real thing at home. The verdict? Honestly, the pizzas were WAY better than average, but I think maybe my oven didn't get hot enough(it only heats up to 500 degrees). And also, my toppings were not too authentic either, maybe I should have tried to do some more authentic styles of pies. At any rate, I would say these pizza are definitely worth trying at home. If you have Mr Reinhart's book you can follow along on page 207 where he begins his introduction to how pizza is the perfect food,etc, but it is pretty interesting reading regarding how so many factors contribute to great pizza, but he believes in the power of the dough. I am not sure that is exactly what I believe, because at Antico Pizza they import all their ingredients from Italy, flour, salt, cheese, tomatoes, and other seasonings including their oregano, and I have to say, theirs is the closest we've had to REAL Italian Pizza. 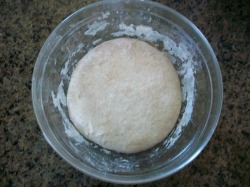 Mixed dough was on the slighty sticky side. Reinhart tells us that the single biggest flaw in pizza making is that the pizza maker doesn't allow the dough a long rest in the refrigerator to release enzymes and improve gluten relaxation. So, after mixing the dough, I cut it into 6 pieces and formed them into balls and slipped them into the fridge. 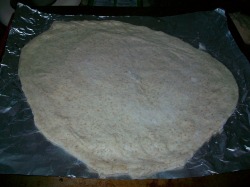 The next day, I took out 4 of the pizza balls (and froze the other two)and made small disks and then let those rest for about 2 hours. I then rolled them out into thin circular type shapes that looked very RUSTIC. Since toppings are endless, and Peter warns against using everything but the kitchen sink, we decided to top each pizza with a different assortment of ingredients. I think they look good enough to send to yeastspotting. 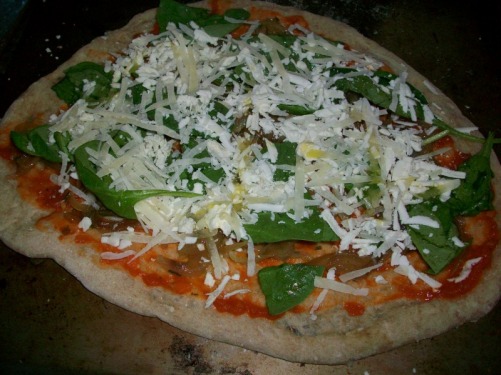 Spinach, carmelized onions,feta, and pecorino in a tomato base 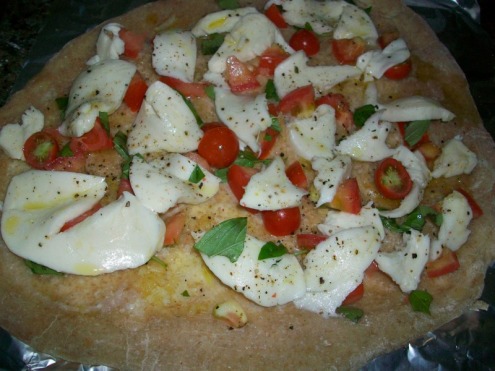 fresh mozzarella,basil, anchovy paste and fresh cherry tomatoes  Carmelized onions,pepperoni, and mozzarella  Spainach, Mushrooms, and fontina cheese 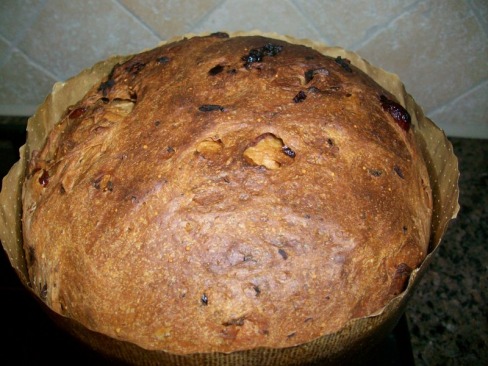 My friend Robin who recently had cancer surgery, loves Italian baked goods. She has been in the hospital since Christmas and is finally out in rehab. So, when I knew I was going to visit her I asked her if there was anything she needed, and she replied: "Panettone would be nice!" How could I refuse such a request? She never got a chance to indulge in the holiday goods when it was in season, And it just so happened that it was next on my list in the Bread Baker's Apprentice Challenge. This remarkably tender, and fluffy bread originated in Milan, according to my Italian hubby, but we see it here in the stores starting in Oct, so I guess you can say the actual freshness of the product is sometimes in question. If you like store-bought Panettone, then you MUST try this home-aide version, number 24 in the Bread Baker's Apprentice book. 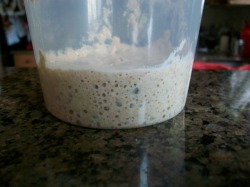 This is a two day bread starting with an active starter. Here you see my starter, "Adam" bubbling away and working his magic. If you still haven't bough the book-- you can find an adapted recipe here, but it's not quite the same as Peter's recipe. 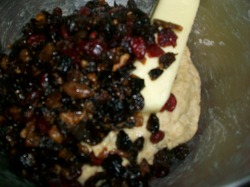 Next the ingredients. This dough was very similar to the egg- butter breads from the beginning of the book, but with the addition of the liquor and the vanilla extract in the soaking dried fruit, the bread had a wonderful aromatic fragrance. 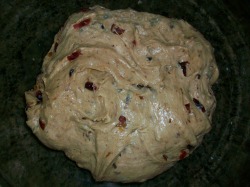 It took a while to get the dough to get the "window pane" texture, but it finally came together. 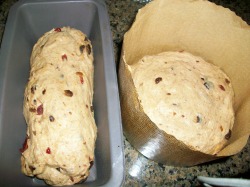 I divided the dough in half and decided to use a loaf pan for the one Nic and I would keep and used a real Panettone mold for Robin's bread. 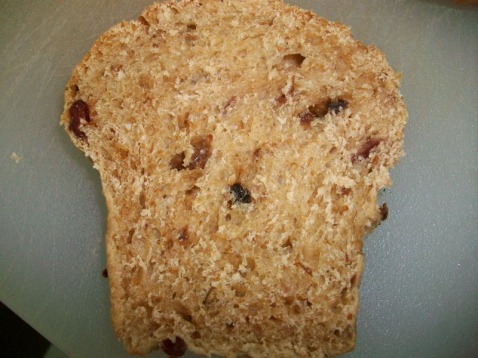 The result was delicious! This tasted WAY better than the dry store bought variety that we're bombarded with every Christmas. Christmas in July is a good reason to bake this festive bread.
Yeastspotted 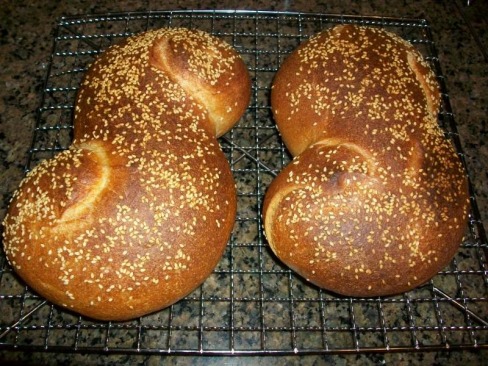 The Sicilians must really know what a gem of a bread they have here. The use of semolina flour is just wonderfully incorporated to produce these golden, chewy, and earthy breads. The only drawback to making this bread is that it took 3 whole days! However, the end product was so delicious, I guess it wasn't too much of a pain in the retrospect. So it seems that I am halfway through now seeing that this is bread #23 in the Bread Baker's Apprentice Challenge, where people all over the globe seem to be possessed in baking every single bread recipe in Reinhart's book. but again, if you don't have the book, look here. 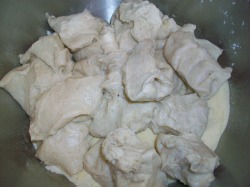 The pate fermentee has to be made first, and then retarded overnight in the fridge. Mine was made using my wild yeast "Adam". The next day, I cut the pate fermentee into about a dozen or so pieces and let it come to room temp before mixing all the ingredients together. 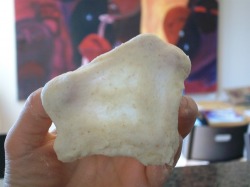 The directions says to continue kneading until the dough passes what is called the "windowpane test" . This actually took a little longer because of the semolina flour, but in the end, the texture of the dough was silky and easy to handle. 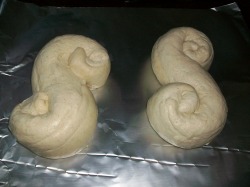 Then let the dough bulk rise until doubled in size before punching down and separating into battons and then shaped like the letter "S". You then cover the formed loaves and again retard them in the refrigerator overnight. 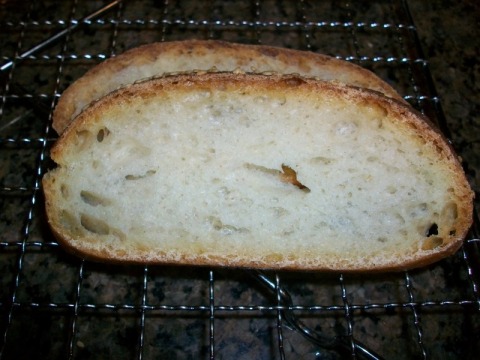 Here you can see the lovely crumb. This bread was incredibly chewy and had a touch of sweetness from the honey. The crust was perfectly crunchy and deliciously studded with the sesame which also aided in the crunch factor. Hmmm... crunchy and chewy... my kinda bread.
yeastpotted! | About Me
I am an amateur home maker who finds great pleasure in creating baked wonders in the kitchen. Favorite links
doughadear ArchivesMarch 2011 CategoriesAll |
 RSS Feed